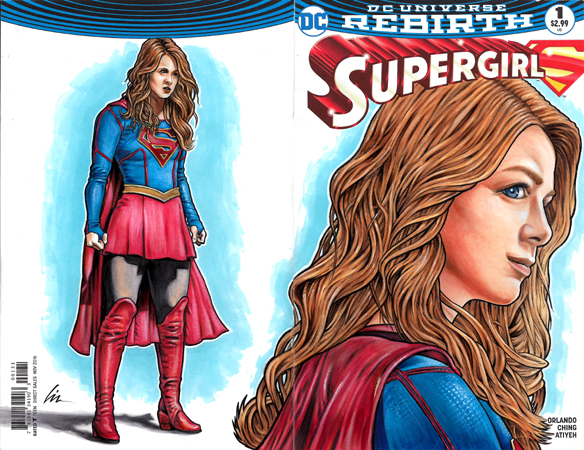
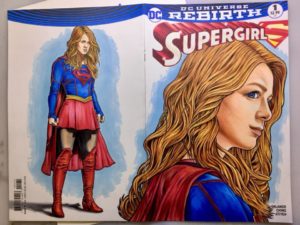
Back for a another sketchcover blog post. This time it’s a Melissa Benoist CW Supergirl cover…for my wife!
My wife Nicki and I enjoy watching the CW’s Supergirl TV show together on Monday nights. She’s a big fan of the character and loves the show. She really geeks out when they throw in some Easter Eggs for the fans, and always loves to not only see great action, but great character moments- especially with the Danvers sisters. The other day I asked my wife what sketchcover should I do next. She walked out of the Batcave and a few minutes later dropped a Supergirl blank cover on my lap..! She even brought me a thumb-drive with reference photos. I got the hint. 😉
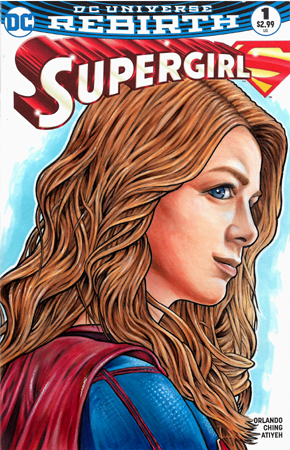
![]()
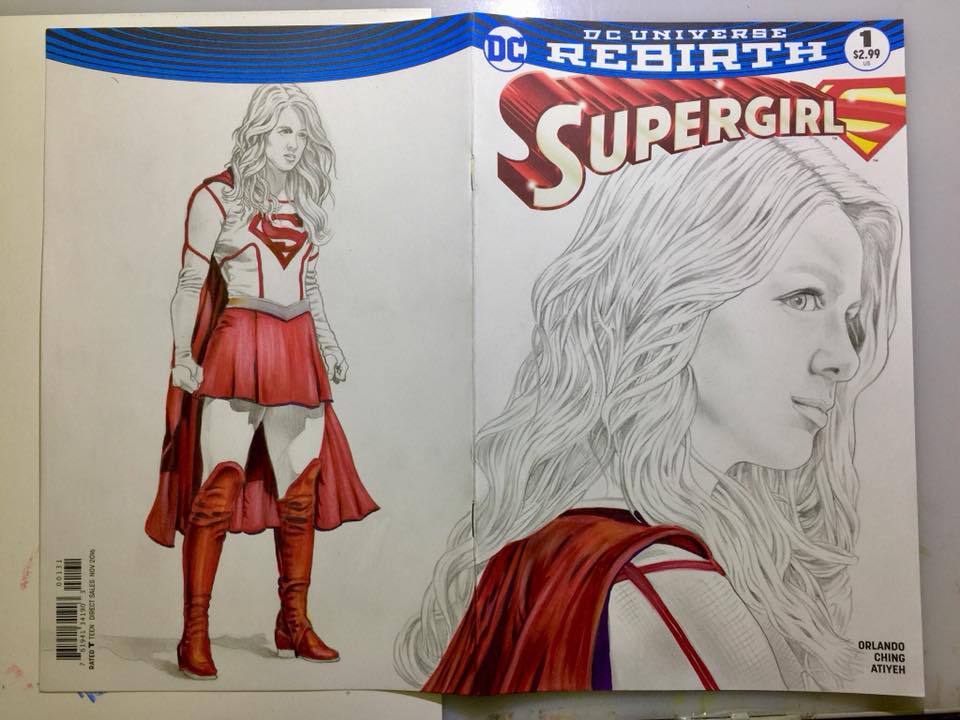
Not all sketchcovers are created equal, and you might be able to tell the difference in these two Supergirl sketchcovers just by looking at them. The one on the left’s cover has a thinner glossy/slick paper stock, and the one on the right has a thicker matte paper stock. I prefer the one on the right, and it’s just like the one Nicki gave me to draw her Supergirl cover on.
The one on the left I’ll probably do a Sharpie marker sketch on someday. It’s a little too slick for my tastes for pencils and Copic markers. Apparently a lot of other artists and collectors complained about it.
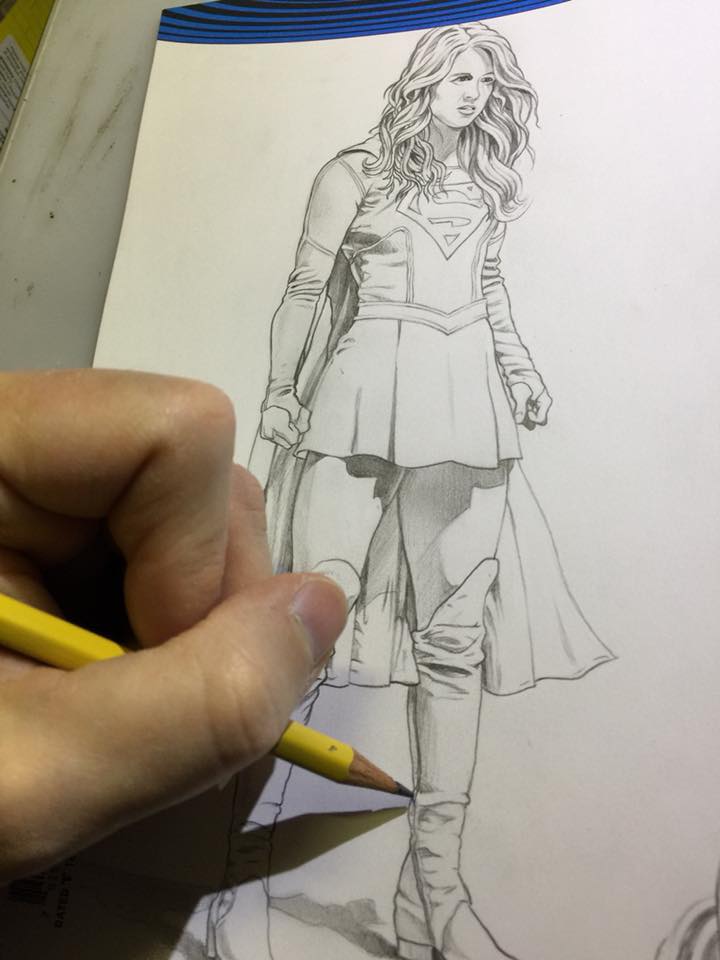
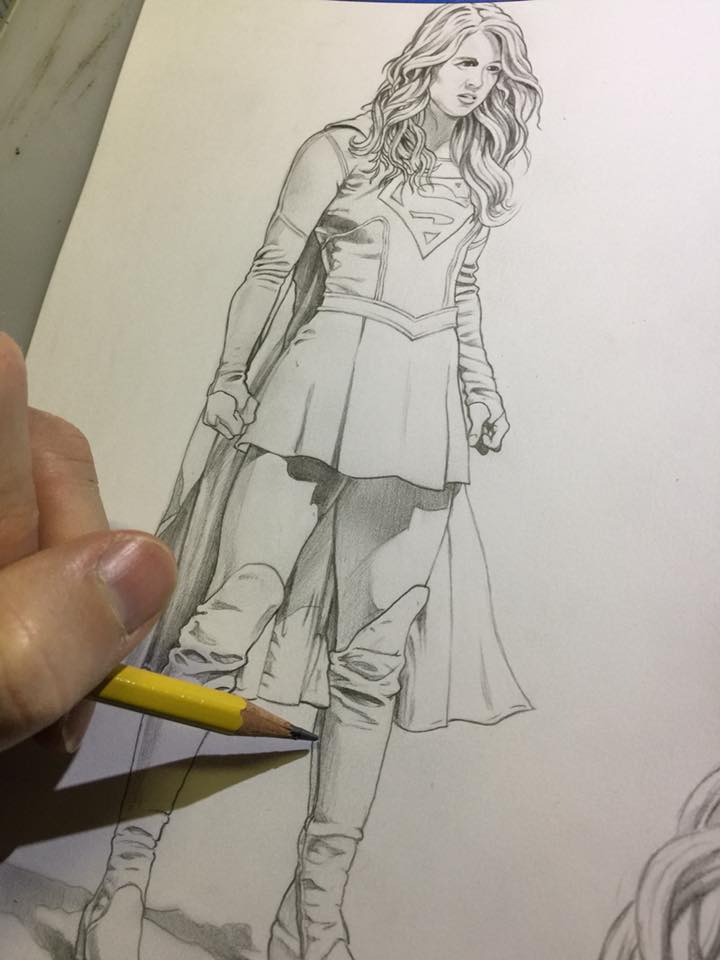
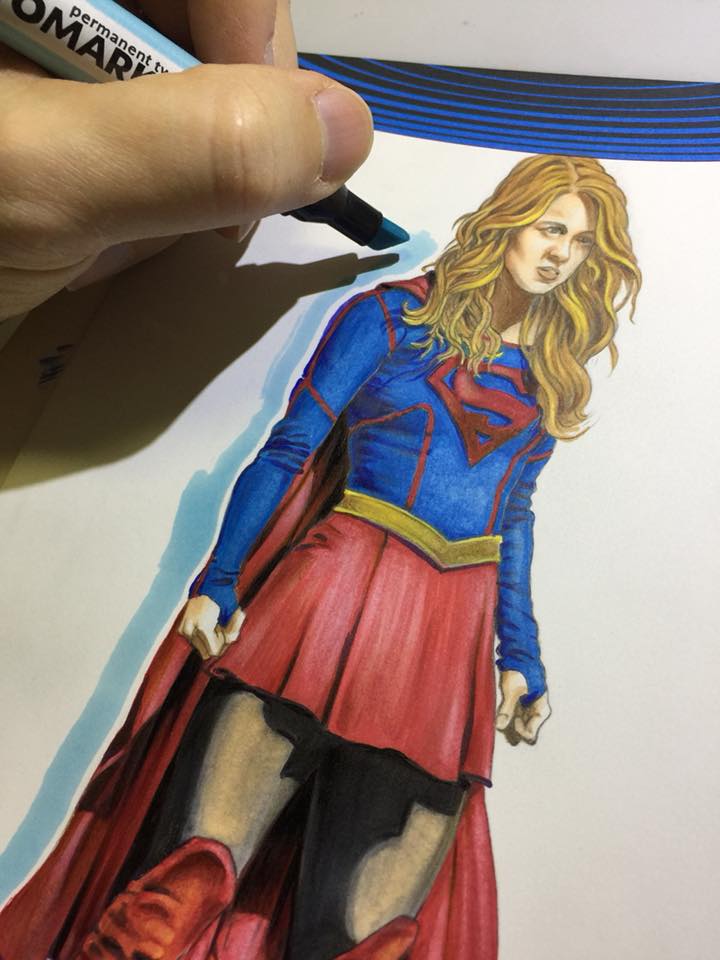
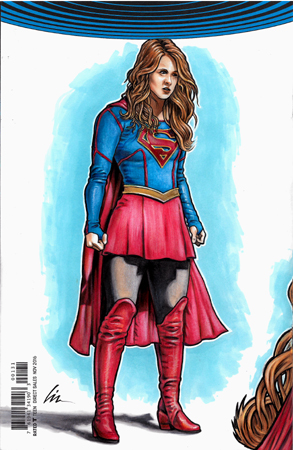
For this one I started off by sizing the photos in Photoshop, printing them out, and then lightboxing some simple outlines in pencil. I then free-handed the rest of the drawing in pencil, adding details and some shading. I also flared her cape out a bit more than what was in the original reference photo. I normally pencil with just a regular yellow #2 HB pencil, but if I wasn’t going to color and ink and just do pencils I would use drawing pencils with different degrees of lead hardness.
For my sketchcovers I’ve been debating whether or not to do a grey marker underbase on the drawing instead of shading with pencils as much, and then come over them with colors. I’ve seen it done very well by other artists, and may just have to experiment sometime. I’ve done it back when I airbrushed on black tees, and I’ve worked on a couple sketches that way in the past. I just wasn’t happy with the results I got on those sketches, but that was back when I first started out using markers, so who knows now.
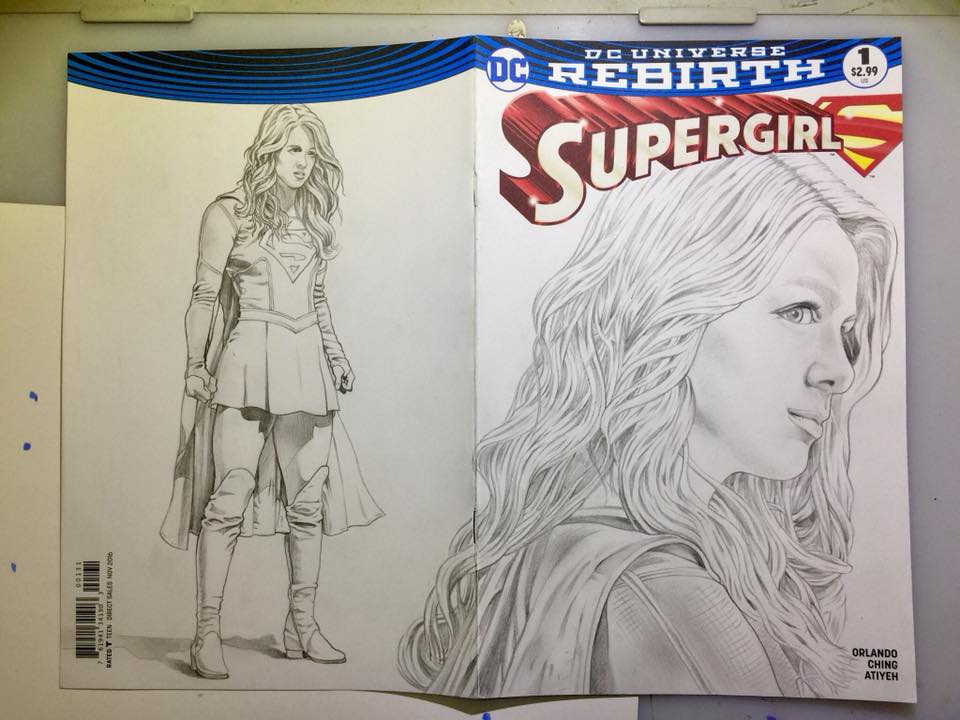
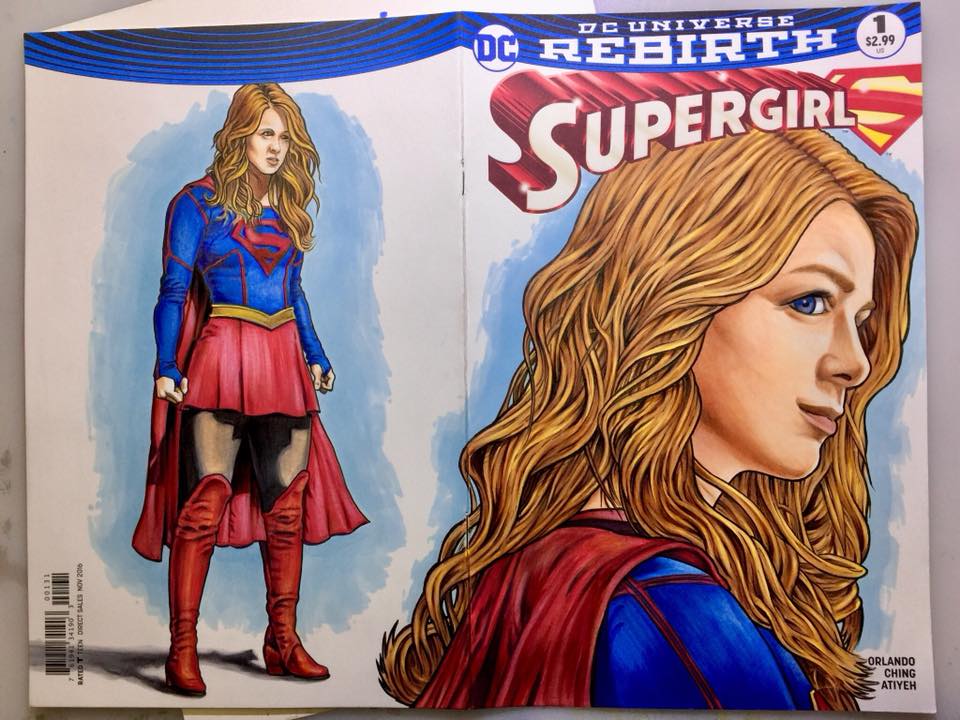
I was going to add some more elements around the figure on the back (her flying and her Kryptonian pod) but decided to just keep it simple and do a head shot on front and full body pose on the back. I may do a more complicated montage layout later on future Supergirl sketchcover. I still have a few extra blanks.
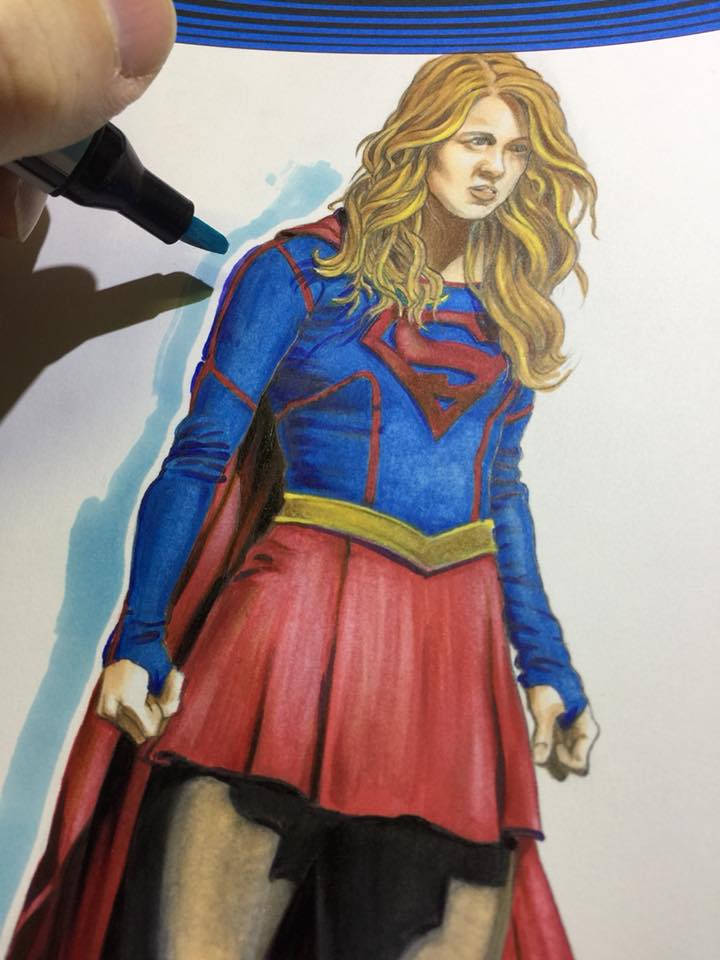
Once I was happy with the pencils I added some color to it. I started off with reds and used Copic markers– a medium red, some pink for highlights, and brown and purple for shadows. I try to stay away from using black for shadows. It tends to make things look a bit flat.
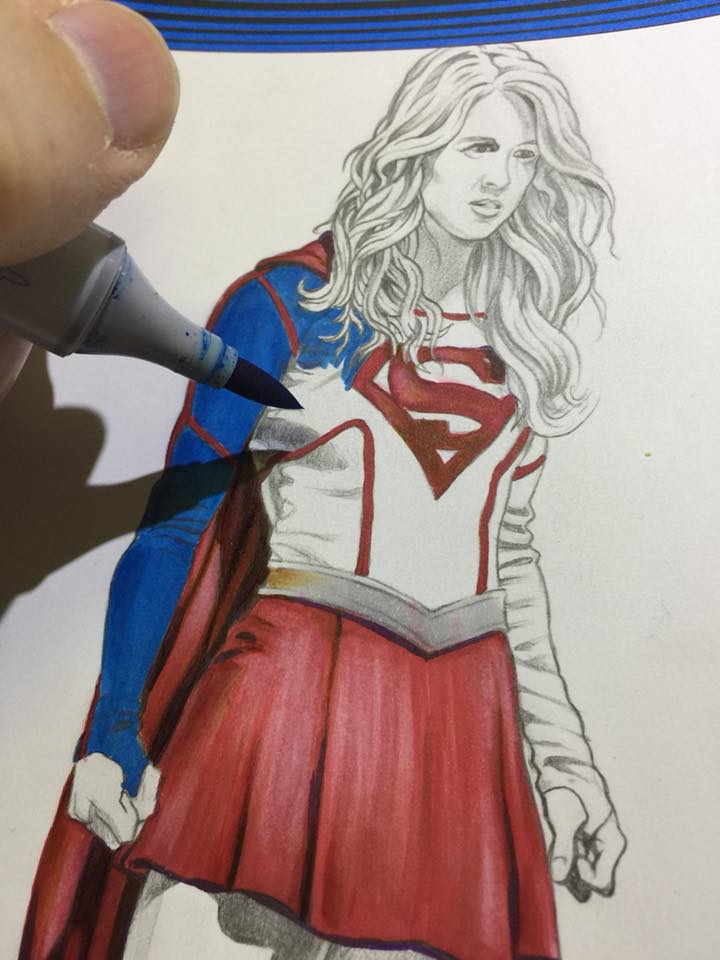
Next, Supergirl got the blues. I used a Copic medium blue, sky blue for highlights, and a dark blue and purple for shadows.
I added a bit of light yellow, light brown, and a khaki color to her belt before moving on to the flesh-tones.
For the flesh I used a medium Copic beige, some pinks, a light brown, and a light skin white.
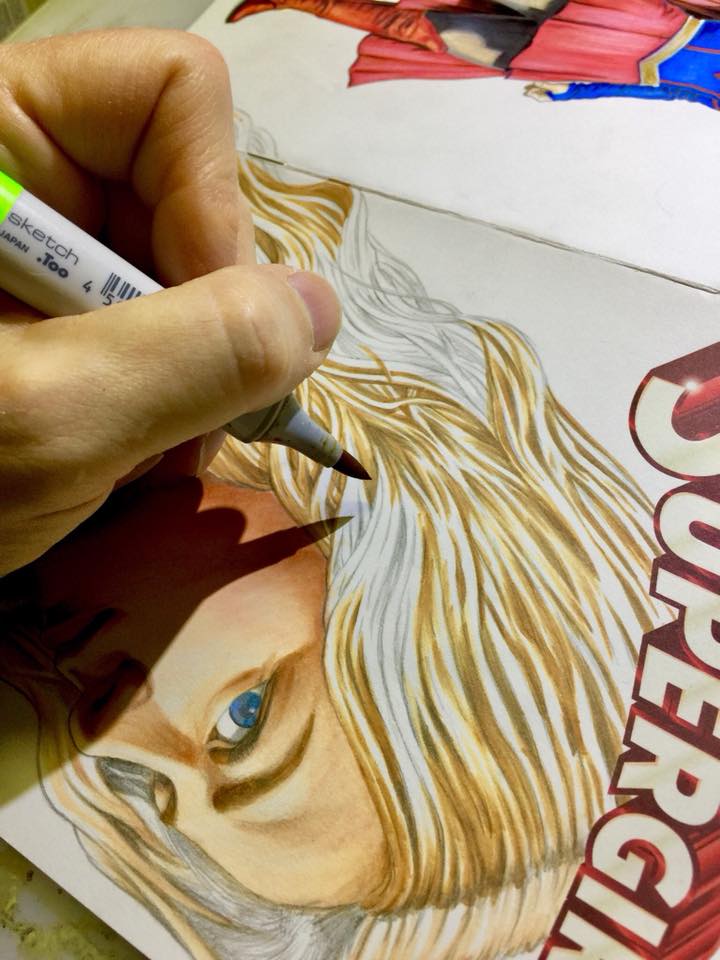
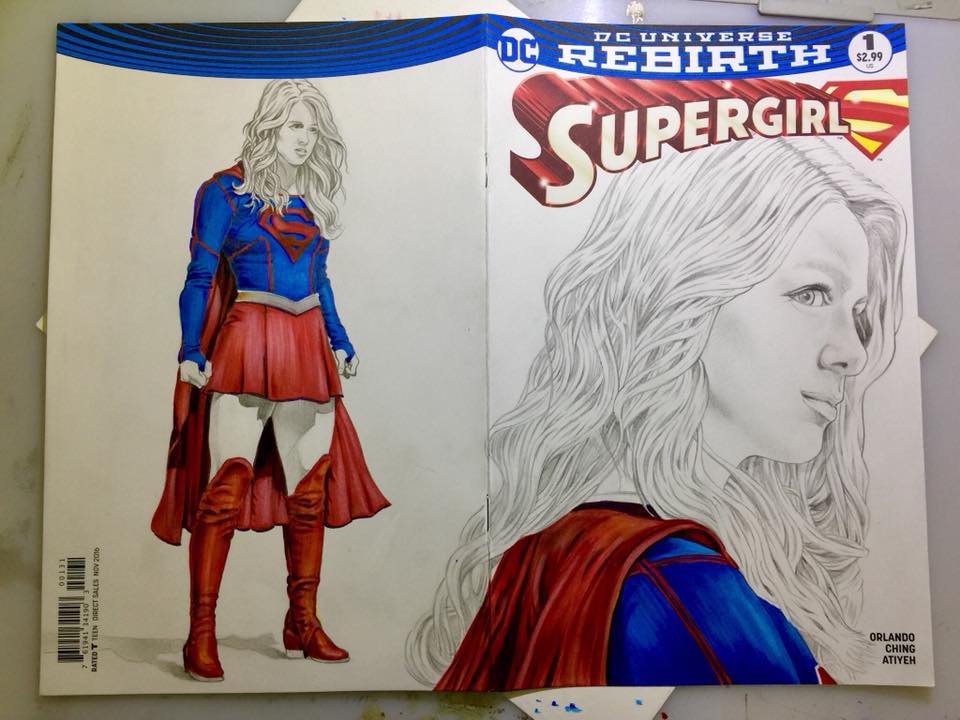
I used more Copic browns, beige, and some golden yellow for her hair. Used a Prismacolor dark brown for the shadow areas. My dark brown Copic had died and I didn’t have a refill for it. That’s one of the advantages I love about Copics- refills, well- when you have them. I also love the brush tip- great for working on hair. I’ve got a good collection of Prismacolor, Letraset and Copic markers these days, and Nicki put several Copic refills in my stocking for Christmas. Otakufuel.com is the best place I’ve found for Copic refills.
After her hairdo (and eyes) had been done, I added a simple light blue background. I was shown by artist Steve Stanley at a gig we did in Atlanta for Coke, that if you put color around an object it helps make it stand out and have a bit more depth than just being on a white background. It doesn’t have to be fancy, and can be limited to just surrounding the image or going outward further- whichever works best. Steve’s one of those guys who can really work the grey markers by themselves or with color, and is great at dynamic layouts.
Wanting to keep the background/outline simple I decided to use a Letraset light blue I had. I didn’t want it the background color to look too much like the light blue Copic I had used on her costume- afraid she might look semi-transparent.
Once I had all the colors finished I inked it with a Pigma Micon pen. I normally ink something like this with a #3, but may use a #1 or #.05 for smaller details, and a #5 or #8 for thicker outlines on the larger parts of the drawing.
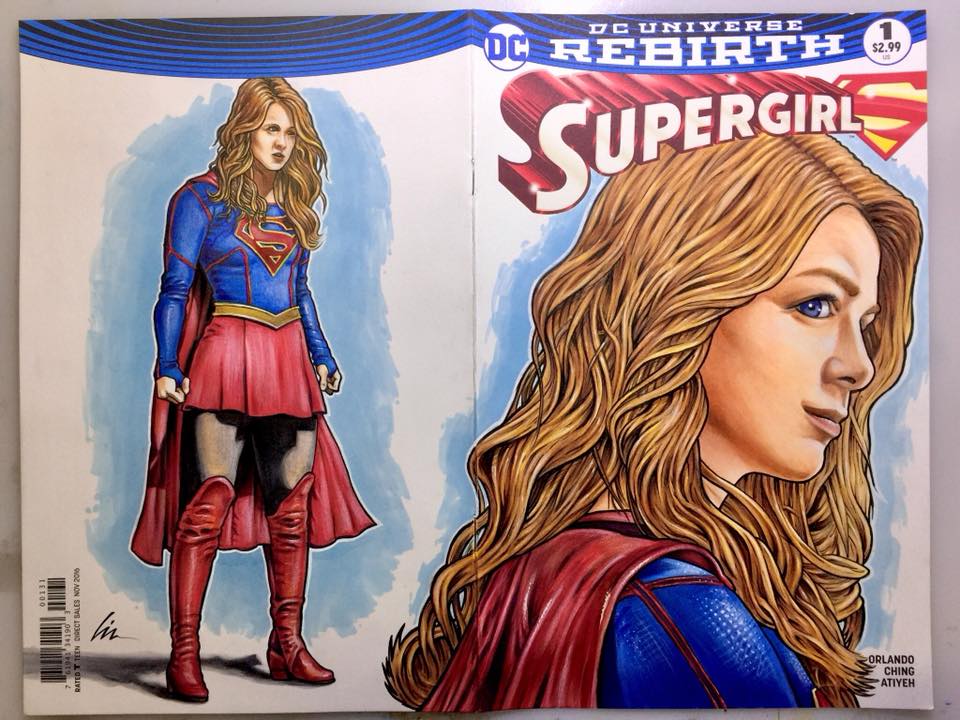
For the finishing touches I used a Gelly Roll white pen and a white Prismacolor pencil for the highlights.
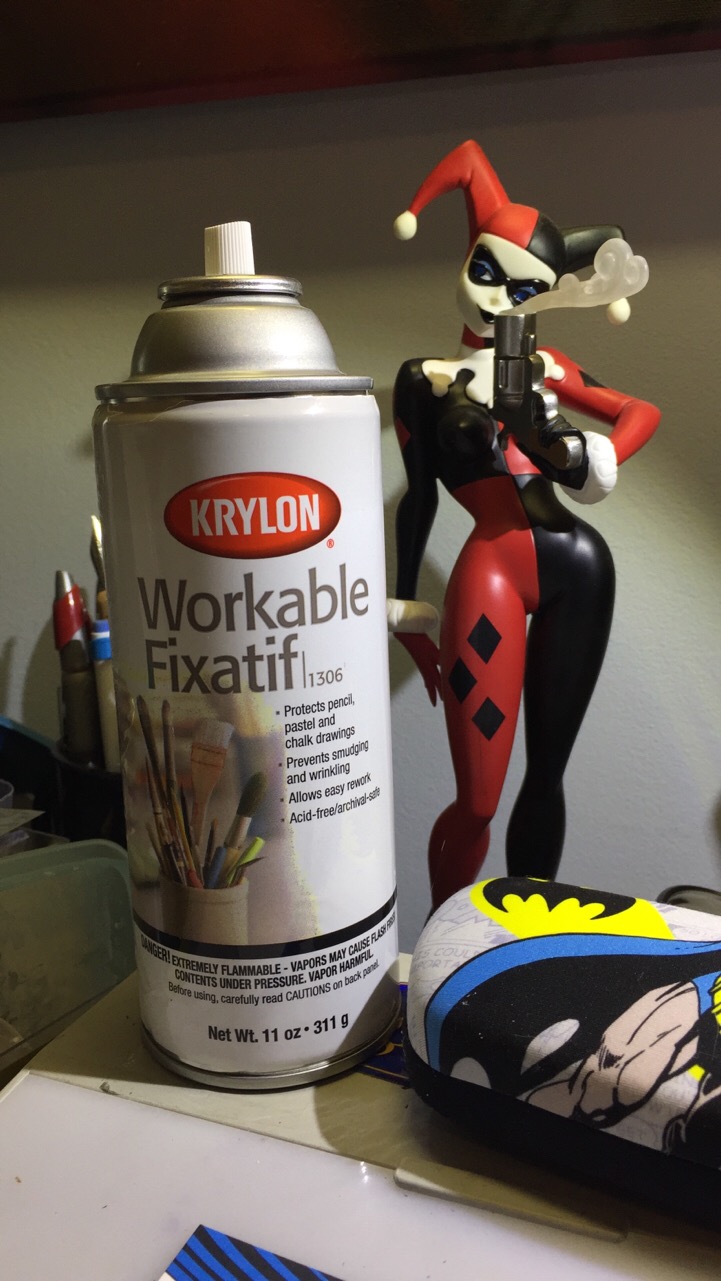
Once finished I sprayed it with a matte fixative (I use Krylon Workable Fixative). There may be better out there, but this one is usually pretty easy to find at art/hobby stores or even Walmart.
And there you have it- my, uh- Nicki’s new Supergirl Sketchcover.
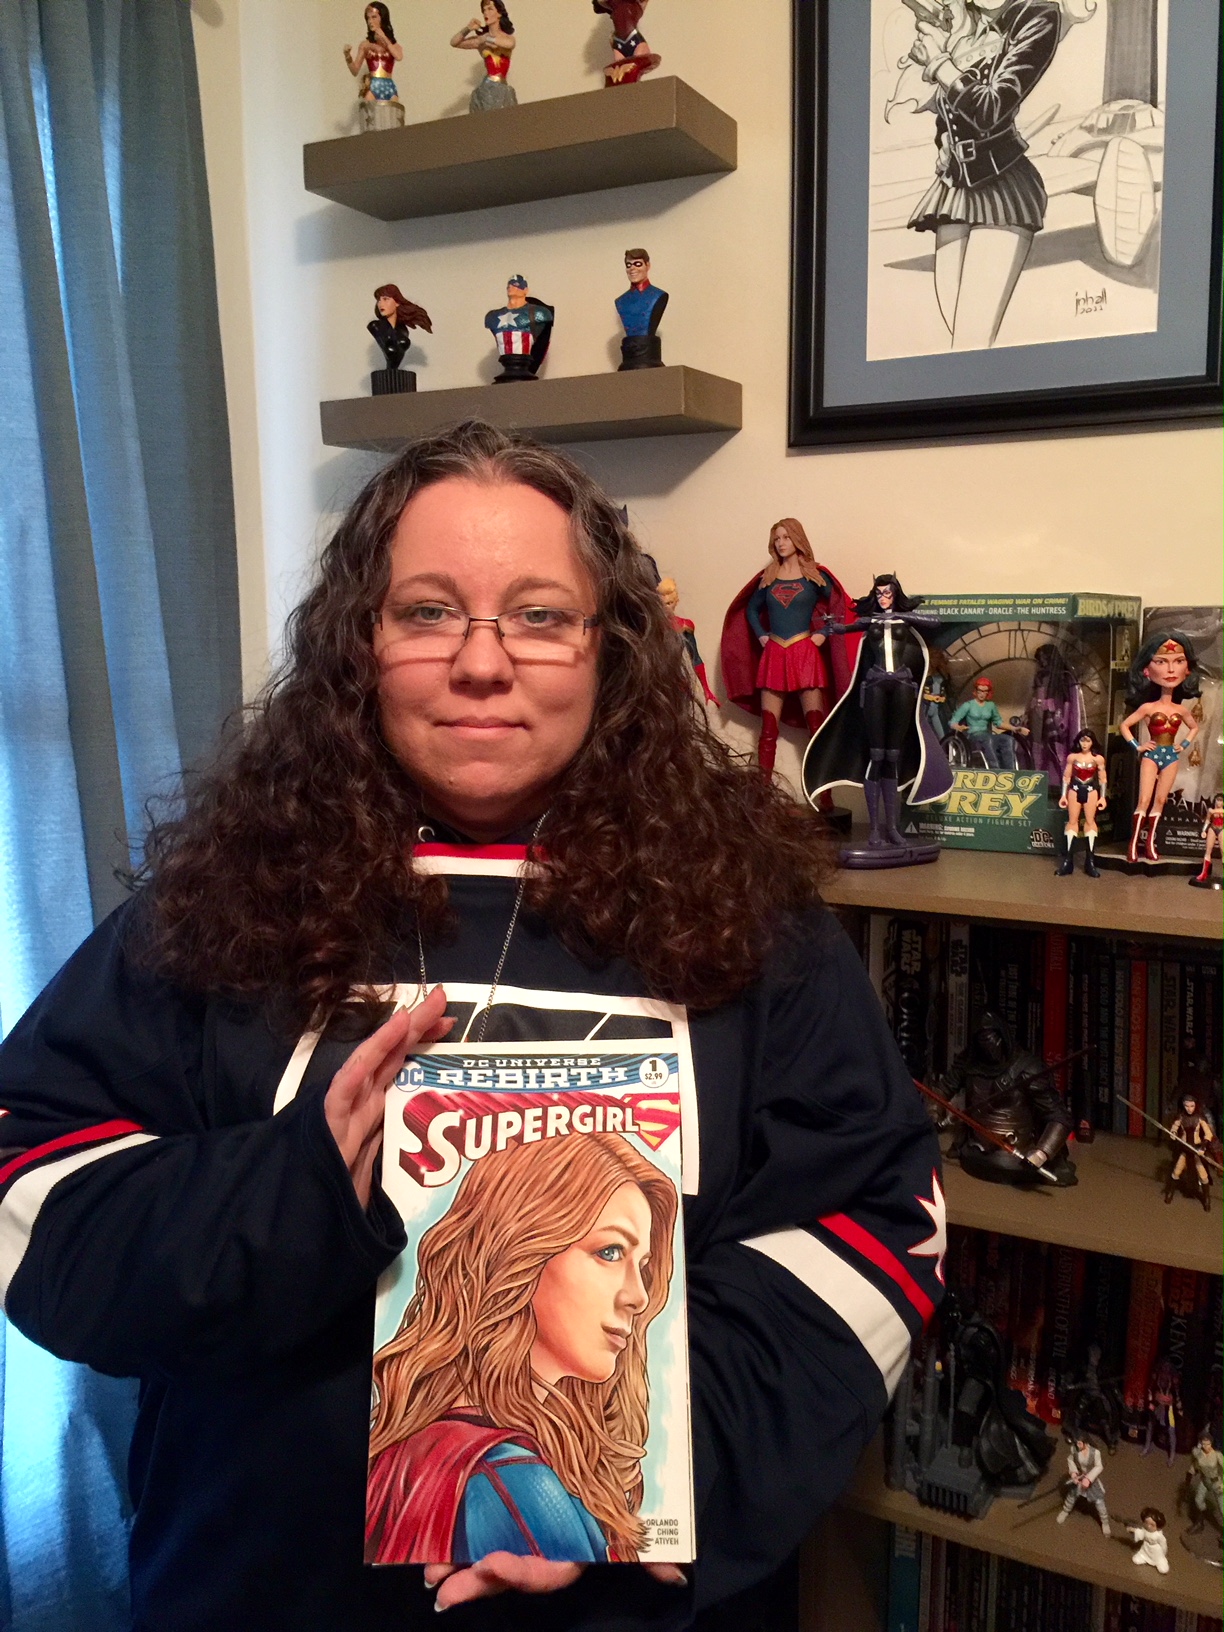

It earned me some good husband points with my \S/upergirl- always a good thing!
Lin
PS- If you are interested in purchasing any of my sketchcovers (or sketchcards) you can find them at The Cellar Tabletop Games and Comics in Bartlett, TN (suburb of Memphis).